Top 10 Back Support Exercises For Pain Relief
If you’ve been experiencing back pain and are looking for some relief, you’ve come to the right place! In this article, we’ll be sharing the top 10 back support exercises that can help alleviate your discomfort. Whether you’re dealing with a strained muscle, a herniated disc, or simply want to strengthen your back muscles to prevent future pain, these exercises are both effective and easy to incorporate into your daily routine. So, grab a mat, find a quiet space, and get ready to give your back the support it needs!
1. Cat-Cow Stretch
Instructions
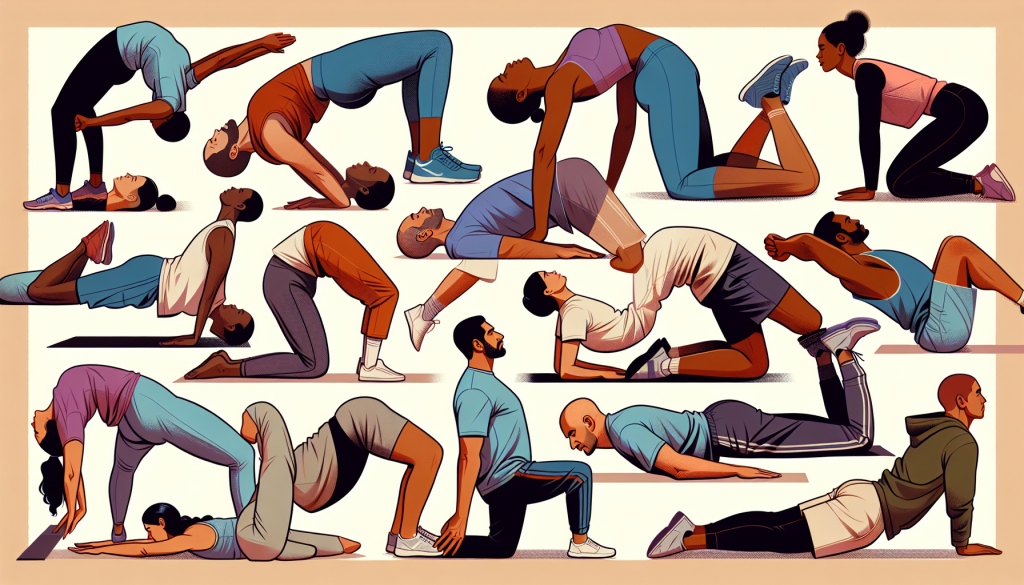
To perform the Cat-Cow Stretch, start by positioning yourself on all fours with your hands directly under your shoulders and your knees directly under your hips. As you inhale, arch your back, lift your chest and tailbone towards the ceiling, and look up, creating a gentle concave curve in your spine. This is the Cow pose. Then, as you exhale, round your back, drop your head towards the floor, and tuck your tailbone under, creating a gentle convex curve in your spine. This is the Cat pose. Repeat this flow of movements for several rounds, synchronizing your breath with the movements.
Benefits
The Cat-Cow Stretch helps to improve the flexibility and mobility of your spine, relieving tension and stiffness in the back. It also helps to stretch and strengthen the muscles in your core and abdomen. By gently massaging the organs in your belly, this stretch can also improve digestion and alleviate menstrual discomfort.
Precautions
While performing the Cat-Cow Stretch, it is important to listen to your body and avoid any movements that cause pain or discomfort. If you have any existing neck or back injuries, it is advisable to consult with a healthcare professional before attempting this exercise. Additionally, individuals with certain medical conditions such as osteoporosis or herniated discs should approach this stretch with caution or avoid it altogether.
2. Bridge Pose
Instructions
To practice the Bridge Pose, lie on your back with your knees bent and feet flat on the floor. Ensure that your feet are hip-width apart. Place your arms alongside your body, palms facing downward. As you inhale, press your feet into the floor and lift your hips off the ground, slowly rolling up through your spine until your thighs are parallel to the floor. Hold this position for a few breaths, then exhale as you roll your spine back down to the floor.
Benefits
The Bridge Pose strengthens the muscles in your lower back, buttocks, and thighs, providing stability and support to the spine. It also helps to open up the chest and shoulders, improving posture and lung capacity. This pose can be particularly beneficial for individuals with desk jobs or those who spend long periods sitting, as it counteracts the effects of prolonged sitting and promotes a healthy posture.
Precautions
While performing the Bridge Pose, avoid overextending your neck or straining your lower back. If you experience any discomfort, you can modify the pose by using props such as a yoga block to support your lower back. Individuals with severe back or neck injuries, as well as those with high blood pressure, should avoid this pose or seek guidance from a qualified yoga instructor.

3. Child’s Pose
Instructions
To practice the Child’s Pose, start by kneeling on the floor with your knees spread wide, big toes touching, and your buttocks resting on your heels. As you exhale, slowly walk your hands forward and lower your torso down, bending at the waist. Allow your forehead to rest on the floor or a yoga block. Rest your arms alongside your body, palms facing up. Gently relax into this position and focus on your breath, staying in the pose for a few deep breaths or as long as feels comfortable.
Benefits
The Child’s Pose is a restorative yoga posture that promotes relaxation and helps to release tension in the back. It gently stretches the muscles of the lower back, hips, and thighs, providing relief from stiffness and discomfort. This pose also calms the mind and relieves stress, making it an excellent option for relaxation and reducing anxiety.
Precautions
While the Child’s Pose is generally considered safe for most individuals, those with knee or ankle injuries should exercise caution and use props, such as a folded blanket under the knees or a bolster under the torso, for added support. Pregnant individuals should avoid this pose if it causes any discomfort or strain. If you have any specific concerns or medical conditions, it is always advisable to seek guidance from a healthcare professional before attempting this or any other exercise.
4. Superman
Instructions
To perform the Superman exercise, start by lying on your stomach with your arms extended in front of you and your legs straight behind you. As you inhale, engage your core muscles and lift your arms, chest, and legs off the ground simultaneously. Imagine reaching your fingertips forward and lengthening your legs behind you. Hold this position for a few breaths, then exhale as you slowly lower your limbs back down to the starting position.
Benefits
The Superman exercise targets the muscles in your lower back, glutes, and hamstrings, promoting strength and stability in these areas. It also engages your core muscles, helping to improve posture and balance. By strengthening the muscles that support the spine, the Superman exercise can help alleviate back pain and prevent future injuries.
Precautions
Individuals with pre-existing lower back issues or injuries should approach the Superman exercise with caution. If you experience any pain or discomfort while performing this exercise, stop immediately and consult with a healthcare professional. It is also essential to maintain proper form throughout the exercise to avoid straining the neck or putting excessive pressure on the lower back.

5. Plank
Instructions
To practice the Plank, begin by positioning yourself on all fours with your hands directly under your shoulders and your knees directly under your hips. Step one foot back at a time, straightening your legs until you are balanced on your toes and hands. Ensure that your body forms a straight line from your heels to your shoulders, engaging your core muscles to maintain stability. Hold this position for as long as feels comfortable, focusing on maintaining a steady breath.
Benefits
The Plank exercise is a full-body workout that primarily targets the muscles in your core, including the abdomen, back, and hips. By strengthening these muscles, the Plank can improve overall spinal stability and reduce the risk of back pain or injury. This exercise also engages the muscles in your arms, shoulders, and legs, promoting strength and endurance.
Precautions
Individuals with wrist or shoulder injuries should take caution when practicing the Plank, as it places weight on these areas. If you experience any discomfort, you can modify the exercise by performing a forearm plank instead, resting on your forearms with your elbows directly under your shoulders. Additionally, individuals with high blood pressure or other cardiovascular conditions may need to avoid or modify this exercise. As always, it is recommended to consult with a healthcare professional before starting or modifying any exercise routine.
6. Cobra Pose
Instructions
To perform the Cobra Pose, start by lying on your stomach with your legs extended, tops of your feet resting on the floor. Place your hands under your shoulders, fingertips pointing forward. As you inhale, press down through your hands and slowly lift your chest off the ground, drawing your shoulder blades back and down. Keep your gaze forward or slightly upward, avoiding any unnecessary strain on the neck. Hold this position for a few breaths, then exhale as you slowly lower your chest back down to the floor.
Benefits
The Cobra Pose is an excellent backbend that stretches and strengthens the muscles in the back, particularly the spine and the muscles supporting it. It can help improve posture and relieve tension in the upper back and neck. This pose also opens up the chest, improving breathing capacity and reducing the risk of respiratory issues. Additionally, the Cobra Pose stimulates the abdominal organs, promoting digestion and overall well-being.
Precautions
Individuals with back injuries, such as herniated discs or sciatica, should approach the Cobra Pose with caution or avoid it altogether. If you experience any pain or compression in the lower back, modify the pose by performing a gentle Sphinx Pose, resting on your forearms with your elbows beneath your shoulders. Always listen to your body, avoid forcing any movements, and seek guidance from a qualified instructor or healthcare professional if needed.
7. Pelvic Tilts
Instructions
To practice Pelvic Tilts, lie on your back with your knees bent and feet flat on the floor, hip-width apart. Relax your arms alongside your body, palms facing down. Inhale deeply, then exhale as you press your lower back into the floor, tilting your pelvis upward and engaging your core muscles. Hold this position for a few breaths, then release and repeat the motion. Continue the movement, focusing on the gentle rocking motion of the pelvis.
Benefits
Pelvic Tilts help to strengthen the muscles of the lower back, abdomen, and pelvic floor, providing stability and support to the spine. These exercises also improve coordination and body awareness, promoting a healthy posture. By reducing tension and improving circulation in the lower back, Pelvic Tilts can alleviate discomfort and stiffness caused by prolonged sitting or standing.
Precautions
Individuals with severe back pain or injuries should approach Pelvic Tilts with caution, consulting with a healthcare professional before attempting these exercises. If you experience any pain or discomfort while performing the movements, decrease the range of motion or stop altogether. Always listen to your body and adjust the exercises to your comfort level.
8. Seated Forward Bend
Instructions
To practice the Seated Forward Bend, start by sitting on the floor with your legs extended in front of you. Ensure that your sit bones are grounded and your spine is elongated. As you inhale, reach your arms up towards the ceiling, lengthening your spine. Then, as you exhale, hinge forward from your hips, leading with your chest, and reach for your feet or ankles. If you are less flexible, you can use a strap or towel to loop around your feet and hold onto for support. Gradually relax into the stretch and hold for a few deep breaths.
Benefits
The Seated Forward Bend stretches and lengthens the muscles in the entire back of the body, including the spine, hamstrings, and calves. It also stimulates the abdominal organs, aiding digestion and relieving constipation. This pose promotes relaxation and can help reduce anxiety and stress.
Precautions
Individuals with lower back or hamstring injuries should approach the Seated Forward Bend with caution or avoid it altogether. If you experience any pain or discomfort, use props such as blocks or bolsters to support your knees or buttocks. It is important to avoid straining or forcing the stretch, allowing yourself to gradually deepen into the pose over time. If you have any specific concerns or medical conditions, it is advisable to consult with a healthcare professional before attempting this or any other exercise.
9. Bird Dog
Instructions
To perform the Bird Dog exercise, start on all fours with your hands directly under your shoulders and your knees directly under your hips. Keep your spine in a neutral position and engage your core muscles. On an inhale, extend your left arm forward and your right leg backward, parallel to the floor. Keep your pelvis level and avoid arching or sinking in the lower back. Hold this position for a few breaths, then exhale as you bring your arm and leg back down. Repeat on the other side.
Benefits
The Bird Dog exercise targets the muscles in your core, back, glutes, and shoulders, improving stability, strength, and coordination. It helps to enhance balance and posture, contributing to a healthy spine. By activating deep abdominal muscles, this exercise can alleviate back pain and improve overall spinal support.
Precautions
Individuals with wrist or shoulder injuries should approach the Bird Dog exercise with caution, avoiding placing excessive weight or strain on these areas. If you experience any discomfort, you can modify the exercise by performing it from your forearms instead of your hands. Individuals with severe back pain or injuries should consult with a healthcare professional before attempting this exercise. As always, listen to your body, maintain proper form, and adjust the intensity to your comfort level.
10. Standing Back Extension
Instructions
To practice the Standing Back Extension, stand with your feet hip-width apart and your hands resting on your hips. Inhale deeply, lifting your chest and lengthening your spine. As you exhale, gently arch backward, leading with your heart and allowing your head to follow the curve of your spine. Keep your core engaged and avoid straining or compressing the lower back. Hold this position for a few breaths, then inhale as you slowly return to an upright standing position.
Benefits
The Standing Back Extension stretches the muscles in the front of the body, including the chest, abdomen, and hip flexors. It helps to counteract the effects of prolonged sitting and poor posture, improving spinal alignment and reducing tension in the upper and lower back. This exercise also stimulates digestion and can boost energy levels.
Precautions
Individuals with neck or back injuries or those with osteoporosis should approach the Standing Back Extension with caution or avoid it altogether. If you experience any pain or discomfort, decrease the depth of the backbend or focus on gentle backbends instead. It is essential to listen to your body, maintain proper alignment, and seek guidance from a qualified instructor or healthcare professional if necessary.
By incorporating these top 10 back support exercises into your fitness routine, you can strengthen your back muscles, improve flexibility, and alleviate pain or discomfort. Remember to start slowly and gradually increase the intensity and duration of the exercises. If you have any specific concerns or medical conditions, consult with a healthcare professional or qualified instructor to ensure these exercises are suitable for you. With regular practice and proper form, you can cultivate a strong and resilient back, promoting overall well-being and a healthier, pain-free lifestyle.


